How to Install Landscape Lighting: A Step-by-Step Guide
Why Install Landscape Lighting?
Good landscape lighting does more than make your yard look pretty at night. It adds safety by illuminating walkways and steps, increases curb appeal, and extends the use of outdoor living spaces. Whether you want subtle path lights or dramatic uplighting on trees and architecture, a well-planned installation transforms a property and provides long-term value.
Planning & Design
Define Your Objectives
Start by deciding what you want to highlight and why—safety (paths, steps), security (front door, dark corners), or accent lighting (trees, façade, water features). Knowing your priorities guides fixture selection and placement.
Map Your Layout
Walk the property at night with a flashlight and sketch a simple plan. Mark walkways, seating areas, focal points, and power source locations. A physical test with temporary lights or even a smartphone flashlight helps visualize spacing and angles before you dig.
Choose Lighting Types
Common landscape lighting systems include low-voltage (12V), line-voltage (120V), and solar. Low-voltage is the most DIY-friendly: safe, efficient, and versatile. LED fixtures are recommended for long life and low energy use. Typical fixture types:
- Path lights — guide walkways and patios.
- Spotlights/spot lamps — accent trees and architectural elements.
- Flood lights — brighten large areas for security.
- Well lights — recessed ground fixtures for uplighting.
- Step lights — integrated or surface-mounted for stair safety.
Tools & Materials You’ll Need
Gather these basics before starting:
- Landscape fixtures and LED bulbs
- Low-voltage transformer sized to handle total wattage
- 12V landscape cable (gauge depends on run length)
- Wire connectors, waterproof splices, and zip ties
- Shovel or trenching tool, wire strippers, voltage tester
- Optional: smart timer or controller, staple gun, conduit
Step-by-Step Installation
1. Assemble and Test on the Ground
Lay out all fixtures and connect them temporarily to the transformer to test brightness and beam angles. This lets you make adjustments before burying cable.
2. Position Fixtures and Dig Trenches
Place fixtures where they look best and dig shallow trenches for the cable—typically 2–6 inches deep for low-voltage systems. Avoid digging near utility lines; call 811 to have underground utilities marked if uncertain.
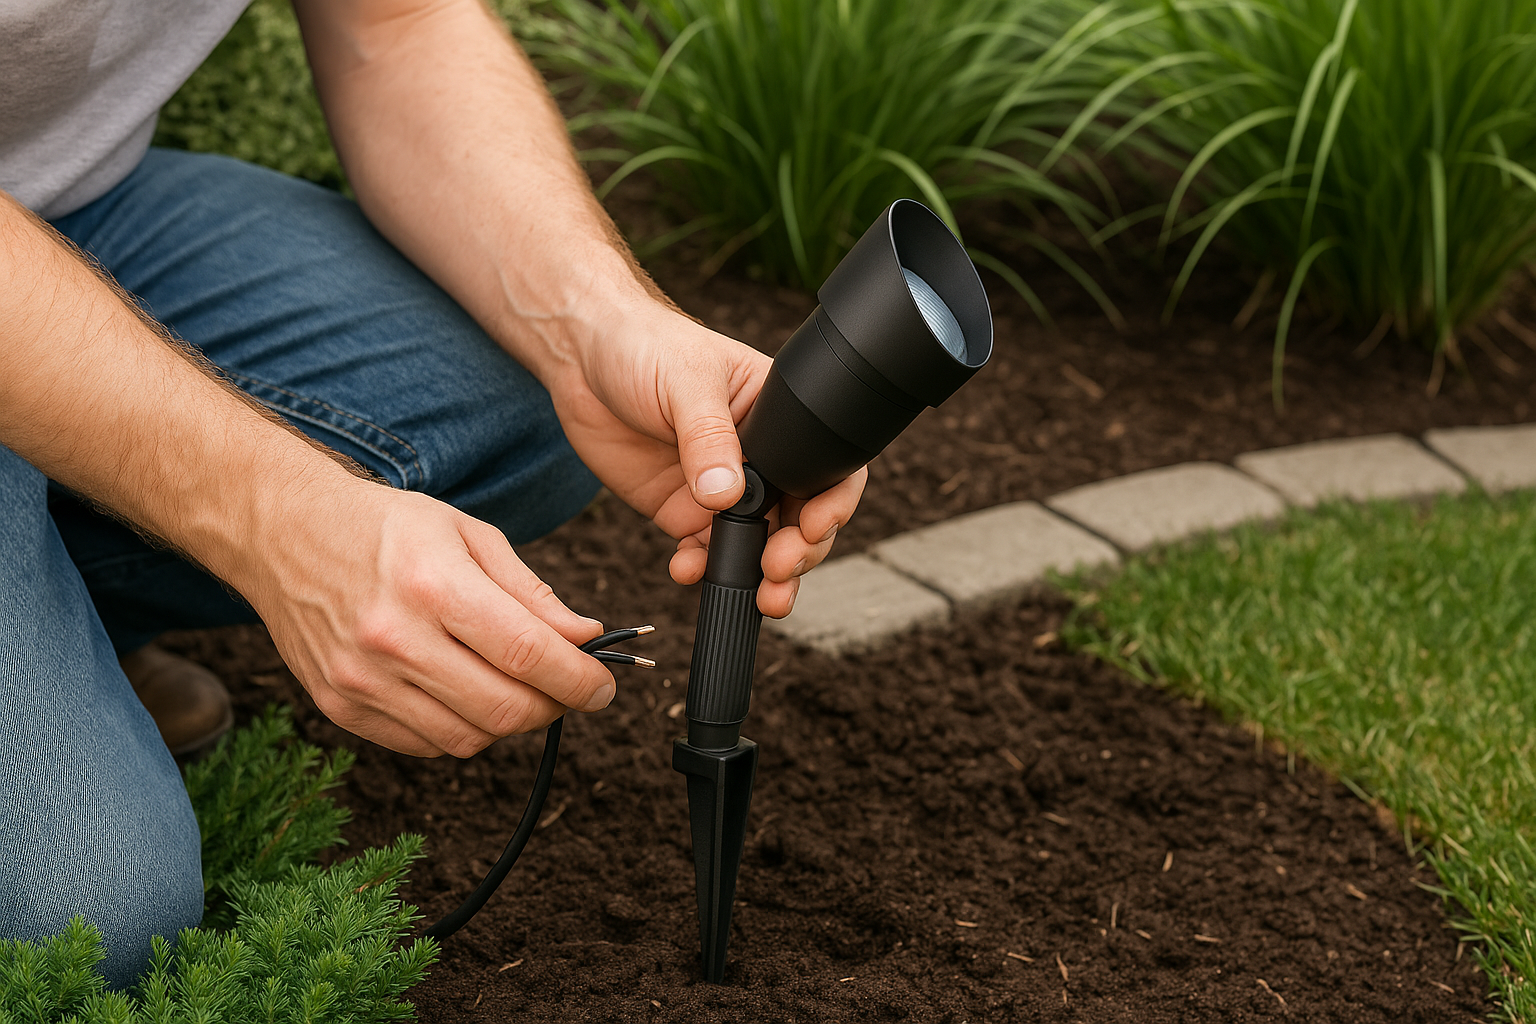
3. Run Cable and Make Connections
Run the cable from the transformer along the trench, leaving service loops near fixtures. Use manufacturer-approved connectors or waterproof wire nuts. Maintain polarity—most low-voltage systems use two conductors without a designated ground, so keep wiring consistent.
4. Mount the Transformer and Connect to Power
Mount the transformer close to an exterior outlet or connect to a dedicated circuit per local code. Install a timer or smart controller if desired. For hardwired transformers, consider hiring an electrician to ensure code compliance.
5. Test, Adjust, and Backfill
Power up the system and test each fixture at night. Adjust aim and beam spread to avoid glare and ensure balanced illumination. Once satisfied, backfill trenches and secure fixtures. Trim plant material as needed to prevent shading lights.
Safety, Codes & Permits
Safety first: low-voltage systems are generally safe for DIY, but any connection to house wiring or installation of a hardwired transformer should follow local electrical codes and may require a permit. Use GFCI-protected outlets for outdoor power and follow manufacturer installation instructions.
Maintenance & Troubleshooting
Landscape lighting is low maintenance when properly installed. Seasonal tasks include clearing foliage away from fixtures, cleaning lenses, and checking connections. If lights flicker or fail, check the transformer load (don’t exceed capacity), look for corroded connectors, and test cable continuity. Replacing LED drivers or bulbs may be necessary after several years.
Cost Considerations & Tips
Expect a wide price range depending on fixture quality and system complexity. A basic DIY low-voltage kit for a small yard can be modestly priced, while professional-grade fixtures and labor raise costs. Tips to save money and improve results:
- Plan thoroughly to avoid moving fixtures.
- Invest in quality fixtures with solid warranties.
- Use LED lamps to reduce energy and replacement costs.
- Group fixtures on circuits thoughtfully to stay within transformer capacity.
- Consider a smart controller for scheduling and remote control.
Conclusion
Installing landscape lighting is a rewarding weekend project that boosts safety, curb appeal, and outdoor enjoyment. With thoughtful planning, the right materials, and attention to safety, you can create a beautiful, functional nightscape that lasts for years. If your project involves complex wiring or local code questions, don’t hesitate to consult a licensed electrician.