DIY Landscape Lighting: A Practical Guide to Beautiful Outdoor Illumination
Introduction
Good landscape lighting can transform a yard from ordinary to inviting, improve safety, and extend the hours you enjoy your outdoor spaces. The great news is that many landscape lighting projects are perfectly suited to DIYers. This guide walks you through planning, choosing fixtures, installing low-voltage systems, and maintaining your lighting so you get a professional look without the pro price tag.
Why Choose DIY Landscape Lighting?
DIY landscape lighting offers several perks: cost savings, creative control, and the satisfaction of improving your home’s curb appeal with your own hands. Modern LED fixtures and low-voltage systems are safer and easier to install than older line-voltage setups, making them ideal for homeowners who want reliable results with minimal electrical experience.
Planning Your Lighting Layout
Successful lighting starts with a plan. Walk your property after dark and note the areas you want to highlight—pathways, steps, trees, water features, and architectural elements. Sketch a layout showing fixture locations and consider the viewing angles from windows, the driveway, and outdoor living spaces. Prioritize safety concerns like stairs and uneven walkways.
Key Planning Tips
- Use the “less is more” principle: start small and expand later.
- Place lights to create layers—ambient, task, and accent lighting.
- Think about glare: hide fixtures behind plants or low walls when possible.
- Measure distances to ensure your transformer and wire run are adequate.
Types of Landscape Lights
Choose fixtures based on function and aesthetics. Here are the most common types:
Path Lights
Short stakes that line pathways for safety and definition. Ideal for low-voltage LED bulbs and simple installation.
Spotlights and Floodlights
Used to highlight trees, sculptures, or the façade of your home. Spotlights offer narrow beams; floodlights cover wider areas.
Well Lights and In-Ground Lights
Flush-mounted fixtures that provide subtle uplighting for trees and architectural features without visible hardware.
Step and Deck Lights
Small fixtures that increase safety on stairs and decks while adding ambiance.
Materials and Tools You’ll Need
For most low-voltage DIY systems you’ll need:
- LED landscape fixtures (path, spot, or step lights)
- Low-voltage transformer sized for total wattage
- Direct-burial landscape cable (12–16 AWG depending on run length)
- Wire connectors, splice kits, or waterproof connectors
- Shovel, trenching tool or trenching shovel, and a staple gun for cables
- Voltage tester, tape measure, and garden gloves
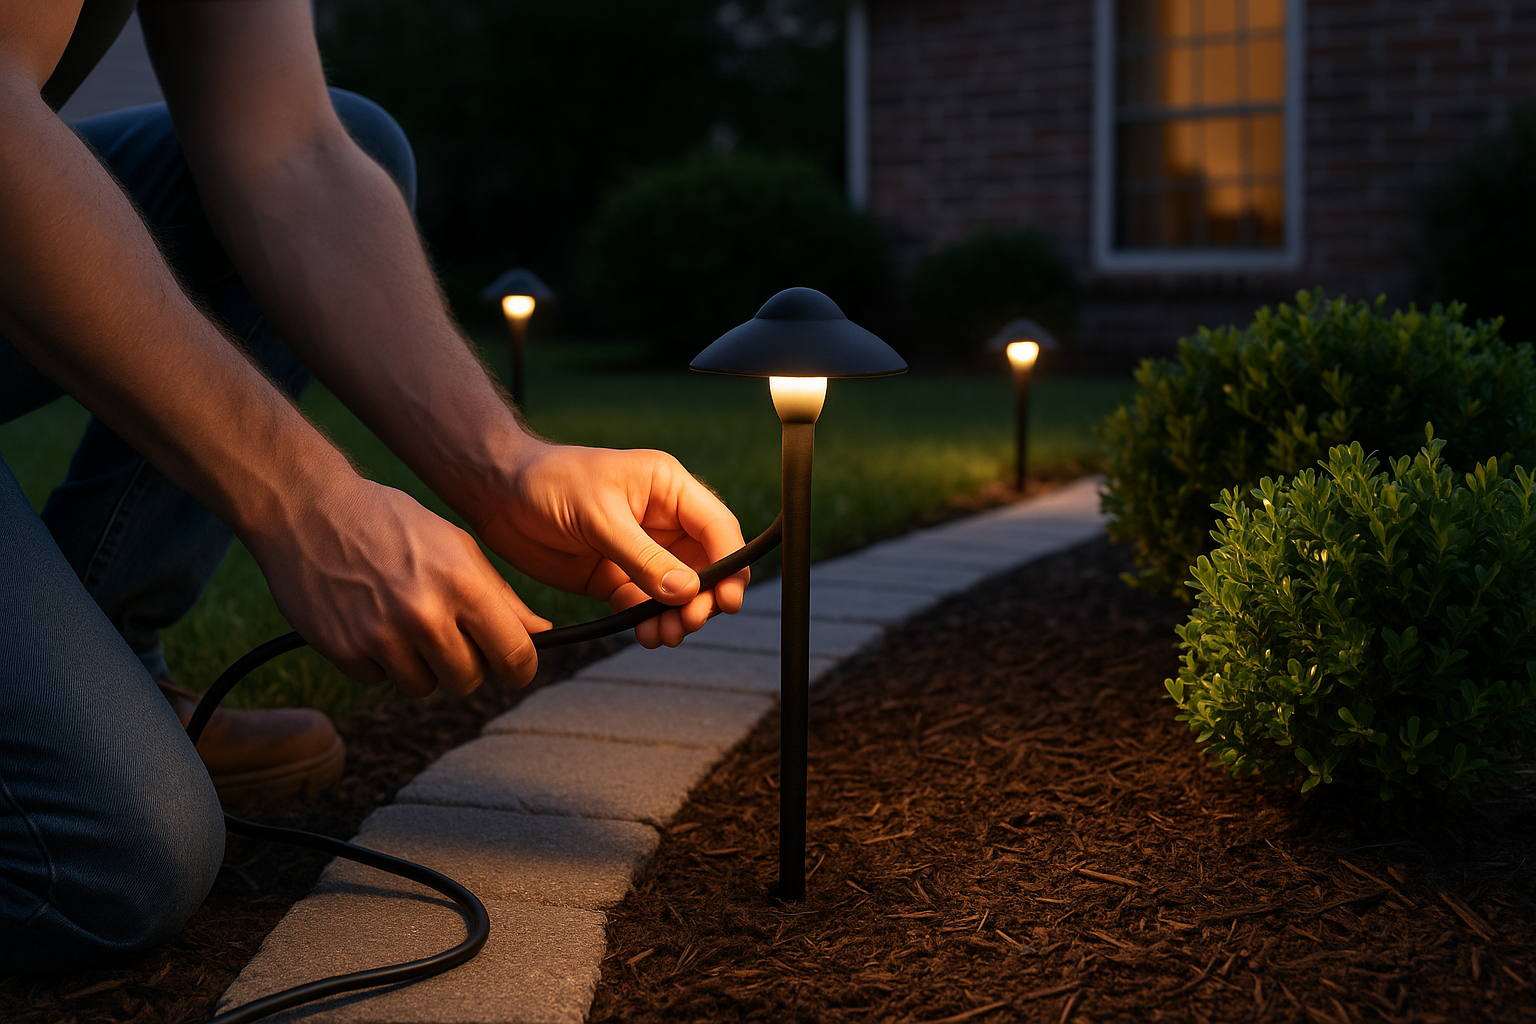
Step-by-Step Installation
1. Lay Out Fixtures
Place each fixture where you sketched it. Temporarily stake them to visualize spacing and angles. Adjust positions so light falls where you want it without causing glare into windows.
2. Run the Cable
Turn off the breaker at the main panel if working near electrical. Dig a shallow trench (4–6 inches is common) along your route. Lay the landscape cable in the trench and staple it at fixtures. Keep curves gentle and avoid the root zones of large trees when possible.
3. Make Connections
Connect fixture leads to the main cable using waterproof connectors. Keep connections off the ground—place them in junction boxes or bury in a small rock-filled pit to ensure drainage. Use a voltage tester to confirm continuity before sealing everything up.
4. Install the Transformer
Mount the transformer close to a GFCI-protected exterior outlet. Do not exceed the transformer’s wattage rating—calculate the total wattage of all fixtures and leave 20% headroom. Plug in and set timers or photocells as desired.
5. Test and Adjust
Turn on the system after dark and walk the property. Aim fixtures, adjust beam spreads, and fine-tune heights to eliminate hotspots and ensure balanced illumination.
Common Mistakes to Avoid
- Oversizing or undersizing the transformer—calculate wattage carefully.
- Placing lights too high, causing glare instead of subtle uplighting.
- Using mismatched fixture color temperatures; stick with warm white (2700K–3000K) for inviting outdoor spaces.
- Ignoring local codes—some areas require permits for electrical work.
Maintenance and Future Upgrades
Routine care will keep your system performing well: check connections annually, clean lenses, and replace damaged fixtures. When ready to upgrade, consider smart controllers or motion sensors to improve convenience and energy savings. LEDs make upgrades simple, with lower wattage and longer life than halogen alternatives.
Conclusion
DIY landscape lighting is a rewarding weekend project that enhances safety, beauty, and property value. With thoughtful planning, the right materials, and careful installation, you can create an outdoor lighting scheme that looks professional and suits your style—without breaking the bank. Start small, test at night, and expand your system over time as you refine the design.