
How to Install a Brick Patio: A Practical Step-by-Step Guide
Planning and Design
Installing a brick patio transforms your outdoor space into a cozy entertaining area or quiet retreat. Good planning prevents headaches later—start by deciding on size, shape, and pattern. Measure the area, sketch a plan to scale, and imagine how the patio connects to walkways, doors, and landscape features.
Measure and choose a layout
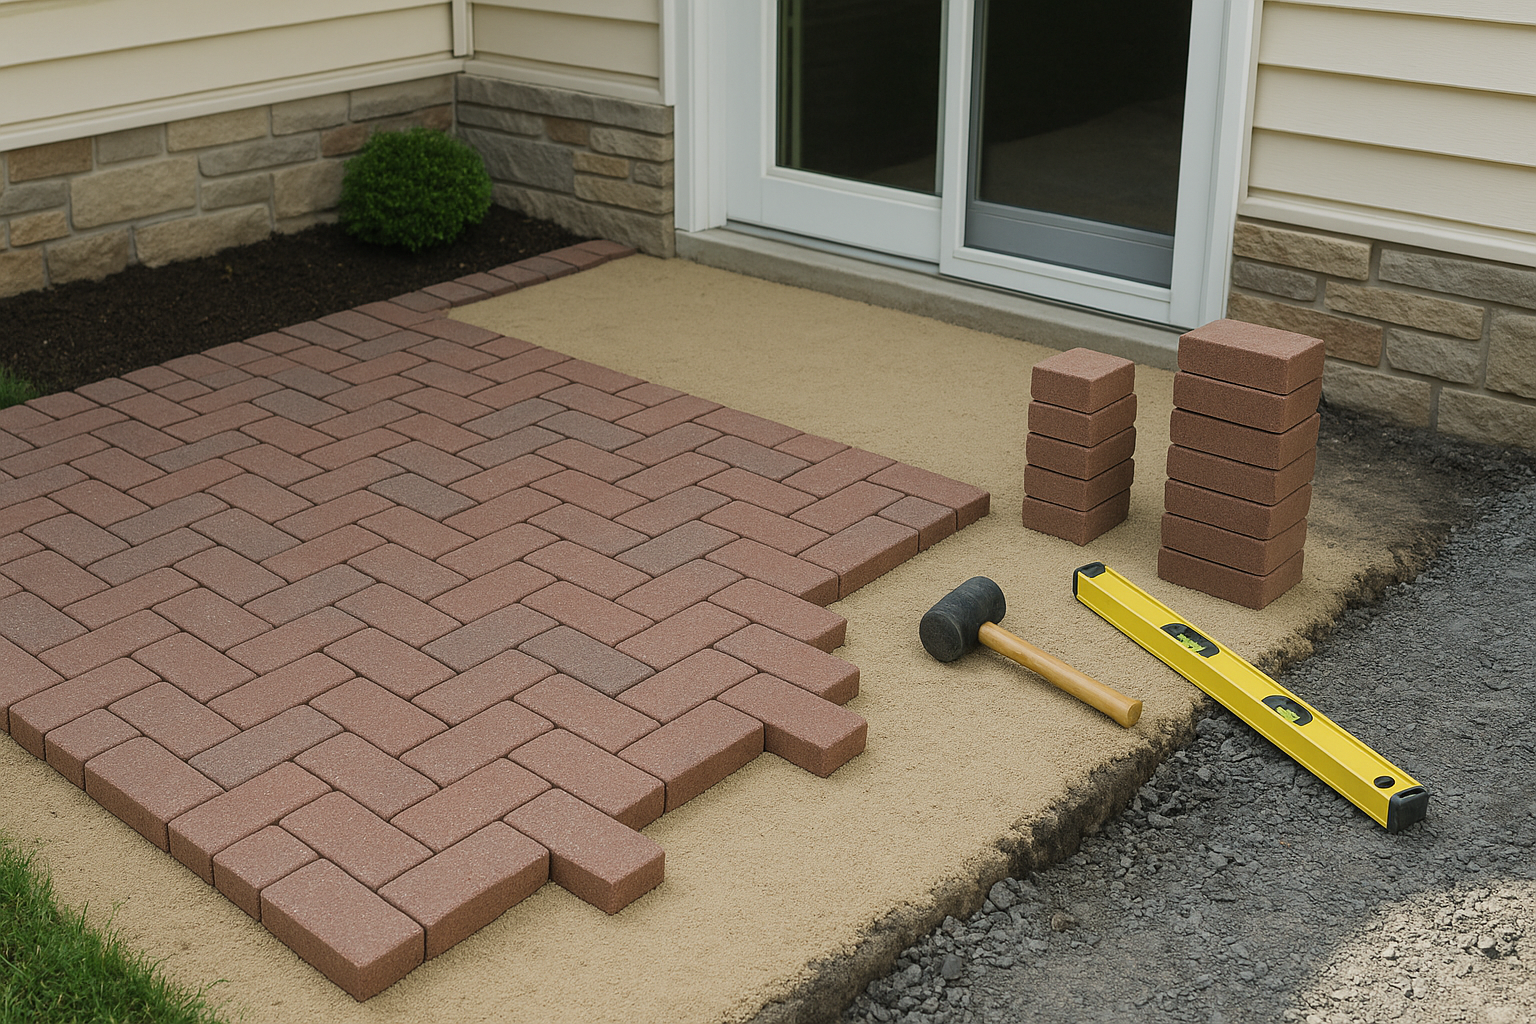
Common brick patterns include running bond, herringbone, basket weave, and stack bond. Herringbone offers exceptional interlock strength for high-traffic areas, while running bond is easier for beginners. Make sure to plan for a slight slope of about 1/4 inch per foot away from the house for proper drainage.
Check local codes and utilities
Call your local utility locating service before digging. Also check if you need permits, especially when altering grades or adding large hardscapes.
Materials and Tools You’ll Need
- Bricks or pavers (allow 5-10% extra for cuts and waste)
- Crushed stone or gravel for base (3/4″ crushed rock recommended)
- Concrete sand or bedding sand
- Polymeric sand or jointing compound
- Edge restraints (plastic or metal)
- Weed barrier fabric (optional)
- Plate compactor, hand tamper, masonry saw or brick chisel, rubber mallet, level, string line, shovel, broom
Step-by-Step Installation
1. Excavation and base preparation
Excavate the area to a depth that accommodates the base, bedding, and brick thickness. Typical depths:
- Patio/walkway: 4″ to 6″ of compacted crushed stone plus 1″ bedding sand
- Driveway or heavy load area: 8″ to 12″ compacted base
After digging, lay landscape fabric if desired, then spread your crushed stone in 2-3″ lifts and compact each layer with a plate compactor for a stable base.
2. Bedding and leveling
Spread a 3/4″ to 1″ layer of concrete sand or coarse bedding sand over the compacted base. Screed the sand using two rails or screed boards set to the final elevation. Maintain the designed slope for drainage.
3. Laying the bricks
Start at a straight edge or corner. Lay bricks tightly together following your chosen pattern. Use a string line and level to keep rows straight and consistent. Tap bricks into place with a rubber mallet and periodically check the slope and level.
4. Cutting and edging
Some bricks will need to be cut to fit curves or edges. Use a wet masonry saw or angle grinder with a masonry blade for clean cuts. Install edge restraints to prevent lateral movement; these are critical for long-term stability.
5. Jointing and compaction
Once the field is laid, compact the surface with a plate compactor set on a protective pad (to avoid scuffing). Sweep polymeric sand or jointing sand into the joints until full, then compact again and re-sweep until joints are complete. If using polymeric sand, follow manufacturer directions for activation with water.
6. Sealing (optional)
Sealing enhances color and reduces staining, but it also changes slip resistance slightly. If you choose to seal, wait for the patio to settle (usually a week), then apply a penetrating or topical sealer suited for brick pavers.
DIY vs Hiring a Professional
DIY is satisfying and can save money if you have time, basic masonry skills, and access to tools. Expect heavy labor—excavation and compaction are strenuous. Professionals bring experience in drainage, base preparation, and pattern layout, and they often complete jobs faster and with longer-lasting results. For complex grades or large installations, hiring a pro is usually worth it.
Maintenance and Longevity
Properly installed brick patios can last decades. Regular maintenance includes sweeping, occasional power washing, reapplying joint sand when it erodes, and resetting any settled bricks. Keep an eye out for plant growth in joints and remove weeds promptly. Address low spots by lifting affected bricks, adding or removing sand, and re-compacting.
Costs and Timeframe
Costs vary by material quality, site prep needs, and labor. As a rough guide:
- DIY material costs: roughly $8 to $20 per sq ft
- Professional install: $15 to $35+ per sq ft
A small patio (100–200 sq ft) can often be completed in a weekend by a skilled DIYer; larger or more complex projects take several days to a week.
Final Tips
- Buy extra bricks for future repairs.
- Work in manageable sections and check levels frequently.
- Consider transitions to lawn or planting beds for a finished look.
Conclusion
Installing a brick patio is a rewarding project that boosts curb appeal and outdoor living space. With careful planning, proper base work, and attention to jointing and drainage, you’ll create a beautiful, durable patio that stands the test of time. If the job feels too big, don’t hesitate to consult a professional to ensure lasting results.