
French Drain Installation: A Practical Guide to Fixing Yard and Basement Drainage
What is a French Drain and why it matters
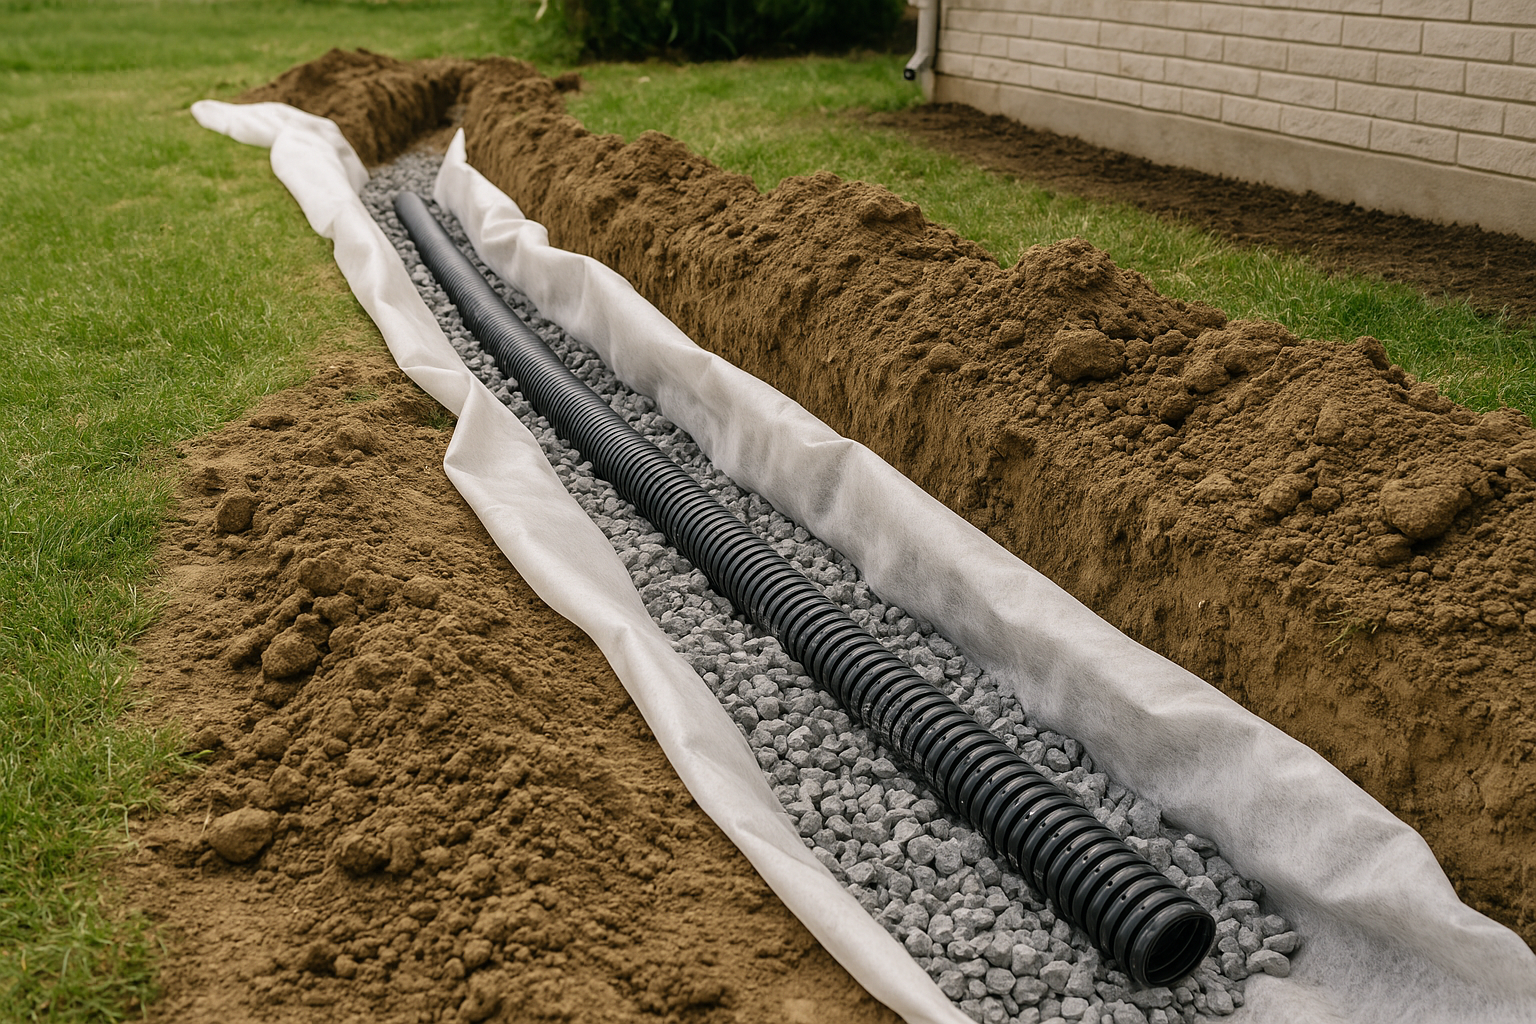
A French drain is a trench filled with gravel or rock that redirects surface and groundwater away from an area. Often lined with landscape fabric and containing a perforated pipe, French drains are a proven, low-maintenance solution for yard drainage problems, soggy lawns, and basement seepage. If you’re tired of standing water, eroding soil, or a damp basement, installing a French drain can protect your property and save you money in the long run.
Benefits of a French drain
- Effectively redirects water away from foundations, slopes, and low spots.
- Reduces soil erosion and prevents plant root damage from standing water.
- Improves usable yard space and reduces mosquito breeding areas.
- Relatively affordable and long-lasting when installed properly.
When to choose a French drain
Consider a French drain if you’re dealing with:
- Persistent pooling in your yard after rain.
- Water collecting near your foundation or basement walls.
- Seepage through basement walls or a musty smell indicating moisture.
- Poorly draining landscaping beds or erosion problems on slopes.
Materials and tools you’ll need
Before you start, gather the following:
- Perforated drainage pipe (PVC or corrugated)
- Landscape fabric
- Washed gravel (¾-inch is common)
- Shovel, trenching shovel, or a rented trencher
- Level and string line
- Downspout adapters and outlet components (if needed)
- Optional: catch basin or dry well for collecting water
Step-by-step French drain installation
1. Plan the route and outlet
Map the path where water naturally flows or where pooling occurs. The drain must slope away from the problem area at about 1%—that’s roughly a 1-foot drop for every 100 feet of pipe. Choose an outlet point: a storm sewer, a dry well, a lower section of your yard, or a safe discharge area several feet from your foundation.
2. Mark and dig the trench
Mark the trench line with spray paint or flags. A typical trench is 6–12 inches wide and 18–24 inches deep, depending on the severity of the issue and frost-line considerations. Use a trenching shovel or rent a trencher for longer runs. Keep the trench bottom smooth to maintain consistent slope.
3. Prepare the base
Lay a 2–3 inch layer of gravel in the bottom of the trench to create a stable bed for the pipe. This allows water to flow freely into the pipe and reduces settling.
4. Add landscape fabric and position the pipe
Line the trench with landscape fabric, leaving plenty of excess on each side to fold over later. Place the perforated pipe on the gravel bed with the holes facing down or to the sides according to manufacturer instructions. Connect pipe segments securely and test the slope again with a level.
5. Backfill with gravel and fold fabric
Cover the pipe with gravel until it’s about 2–3 inches below ground level. Fold the excess landscape fabric over the gravel to prevent soil infiltration. Finish by covering the remaining top with soil, sod, or decorative stones depending on how you want the area to look.
Maintenance tips
- Inspect the outlet periodically to make sure it’s not clogged with leaves or debris.
- Check for signs of settling along the trench and add gravel if necessary.
- Keep downspouts connected and directed into the drain system to prevent concentrated surface flow.
DIY vs. hiring a professional
Smaller, straightforward projects—like redirecting a downspout or fixing a low spot—are good DIY candidates if you’re comfortable with digging and following grade. Larger jobs near foundations, under driveways, or where permits are required are best handled by pros. A contractor will assess soil conditions, ensure proper slope and outlet placement, and avoid utility lines.
Cost considerations
Costs vary by length, materials, and labor. DIY material costs for a short trench can be modest, while professional installations include excavation, permits, and possible landscaping repairs. Consider long-term value: a properly installed French drain can prevent costly foundation repairs and basement water damage.
Common mistakes to avoid
- Incorrect slope—too flat and water will stagnate.
- Using the wrong gravel or skipping landscape fabric, which can clog the system over time.
- Discharging water too close to the foundation or a neighbor’s property.
Conclusion
A French drain is a practical, effective way to manage groundwater and protect your home and landscape. With careful planning, the right materials, and attention to slope and outlet placement, you can solve persistent drainage problems and reduce future maintenance. Whether you tackle it as a DIY weekend project or hire a pro for complex situations, a well-installed French drain provides reliable peace of mind.