How to Install an Arbor: A Step-by-Step DIY Guide for a Lasting Garden Feature
Introduction
An arbor is a beautiful and functional addition to any garden—framing a path, supporting climbing plants, and creating a welcoming entrance. Installing one yourself is a rewarding project that can be completed in a weekend with basic tools and a bit of patience. This guide walks you through site selection, tools and materials, step-by-step installation, and maintenance tips to keep your arbor looking great for years.
Choosing the Right Arbor
Before you start digging, consider style, material, and size.
Style and Function
- Decide whether you want a freestanding entry arbor, a pathway arbor, or one attached to a fence or wall.
- Think about plant choices: heavy climbers like roses need sturdy construction, while lightweight vines can use thinner members.
Materials
Common options are pressure-treated wood, cedar, redwood, and metal. Cedar and redwood resist rot naturally and look great, while pressure-treated lumber is budget-friendly. Metal arbors are durable but may need different anchoring methods.
Tools and Materials You’ll Need
- Arbor kit or lumber (posts, crossbeams, lattice or slats)
- Concrete mix (fast-setting or regular)
- Gravel for drainage
- Tape measure, level, string line
- Post hole digger or auger
- Shovel and wheelbarrow
- Galvanized or stainless fasteners (screws/bolts)
- Drill/driver, saw (if cutting lumber), carpenter’s square
- Stain/paint and brushes or sprayer, exterior wood preservative
Step-by-Step Installation
1. Plan and Mark the Site
Measure the footprint of the arbor and mark post locations with spray paint or stakes. Use a string line between stakes to ensure posts are in a straight line for pathway arbors. Check for underground utilities before digging.
2. Dig Post Holes
Post holes should generally be 1/3 the above-ground height of the posts, and at least 8–12 inches in diameter. Use a post hole digger or auger. Add 3–4 inches of gravel to the bottom of each hole for drainage.
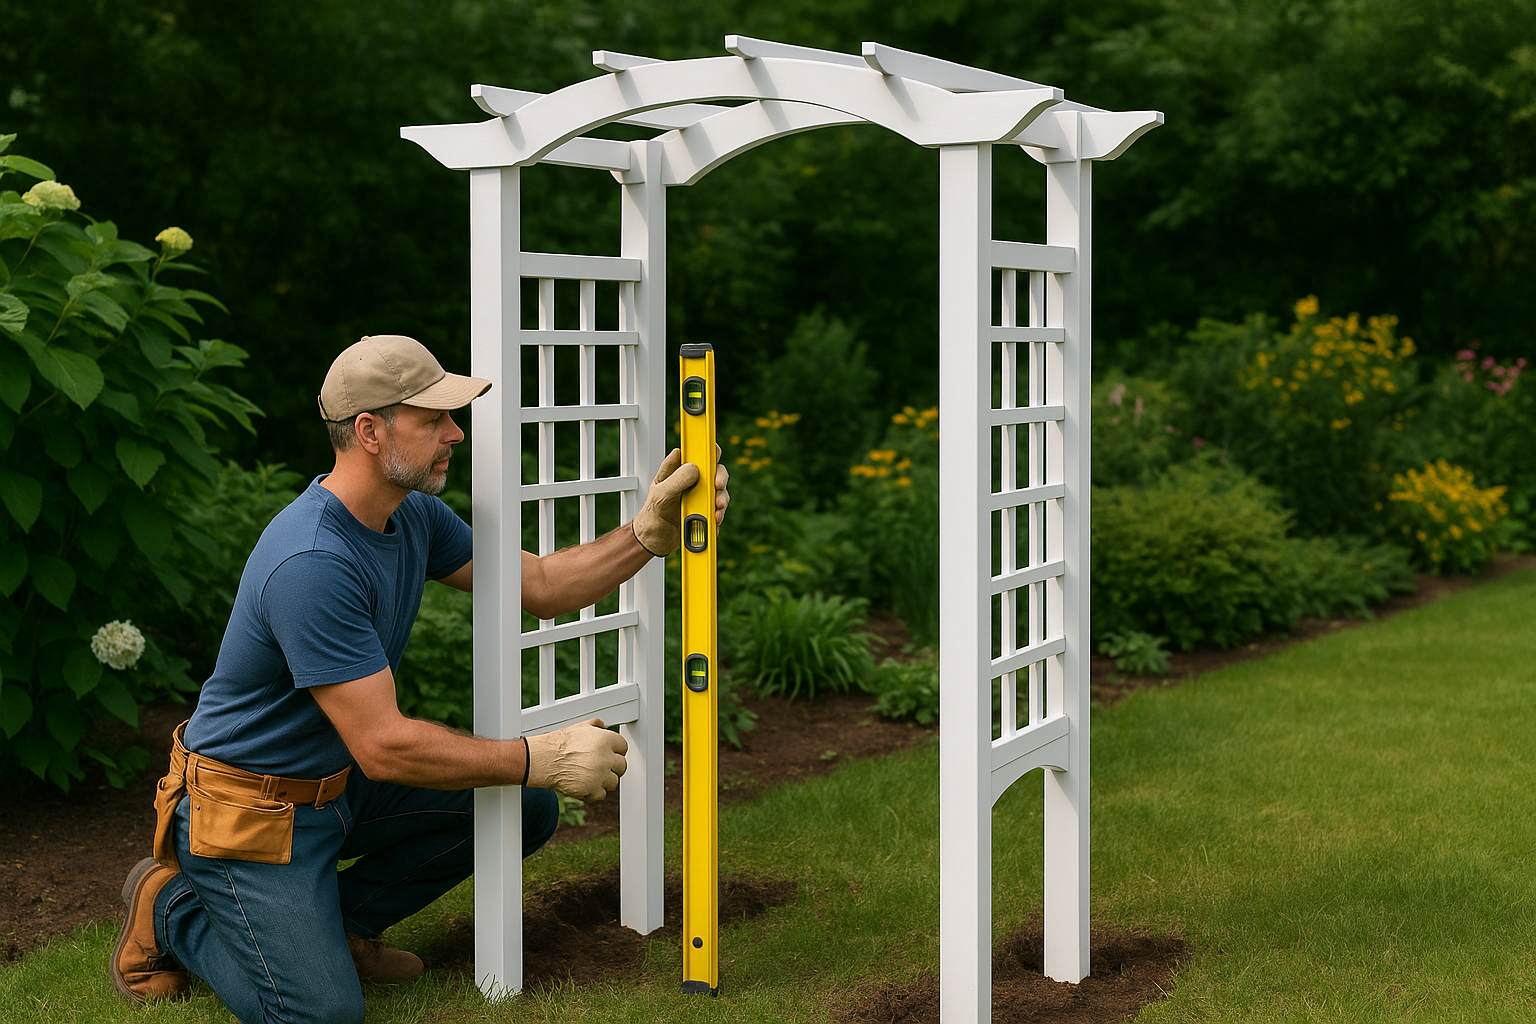
3. Set the Posts
- Place the posts in the holes and brace them temporarily with 2x4s to hold them plumb.
- Mix concrete and pour into the hole around the post, filling to ground level. For faster projects, use fast-setting concrete.
- Check the posts with a level in two directions and adjust before the concrete sets.
4. Attach Crossbeams and Bracing
Once posts are solid (follow concrete cure times), attach crossbeams or header boards. Use galvanized lag screws or structural brackets. Add corner braces for extra rigidity, especially for taller arbors or heavy plant loads.
5. Install Lattice or Slats
Install any decorative lattice, slats, or trellis pieces to the sides and top. Space slats evenly for a balanced look and secure them with screws. If using an arbor kit, follow the manufacturer’s instructions for these pieces.
6. Finish and Protect
Sand any rough edges, then apply a wood preservative, stain, or paint designed for exterior use. Two coats are recommended for long-term protection. If planting climbers, wait for the finish to cure fully before training plants to the arbor.
Anchoring Alternatives
- Concrete Footings: Most durable—embed posts directly in concrete.
- Post Anchors: Metal anchors set in concrete keep wood off the ground and simplify future replacement.
- Deck Mounts: If attaching to a deck or hard surface, use structural hardware rated for outdoor use.
Planting and Training Climbers
Choose climbers suited to your climate and sun exposure. Lightweight vines like clematis or jasmine are easy starters. Heavier roses or wisteria require stronger support. Train plants gradually, tying stems loosely to lattice with soft ties.
Common Mistakes to Avoid
- Undersizing footings—make sure posts are deep enough and set in concrete where required.
- Using non-galvanized fasteners—cheap steel will rust quickly outdoors.
- Skipping preservation—untreated cuts or end grains should be sealed to prevent rot.
- Planting too close—allow space for growth and airflow to reduce disease risk.
Maintenance Tips
Inspect the arbor annually for loose fasteners or rot. Re-stain or repaint every 3–5 years depending on exposure. Prune climbing plants regularly to prevent excessive weight and to encourage healthy growth.
Conclusion
Installing an arbor is a manageable weekend project that adds charm and structure to your garden. With good planning, the right materials, and careful installation, you’ll have a beautiful entrance or focal point that supports plants and creates outdoor living character for years to come.