Landscaping a Flagstone Walkway: Design Ideas, Installation Tips, and Maintenance
Why Choose a Flagstone Walkway for Your Landscape?
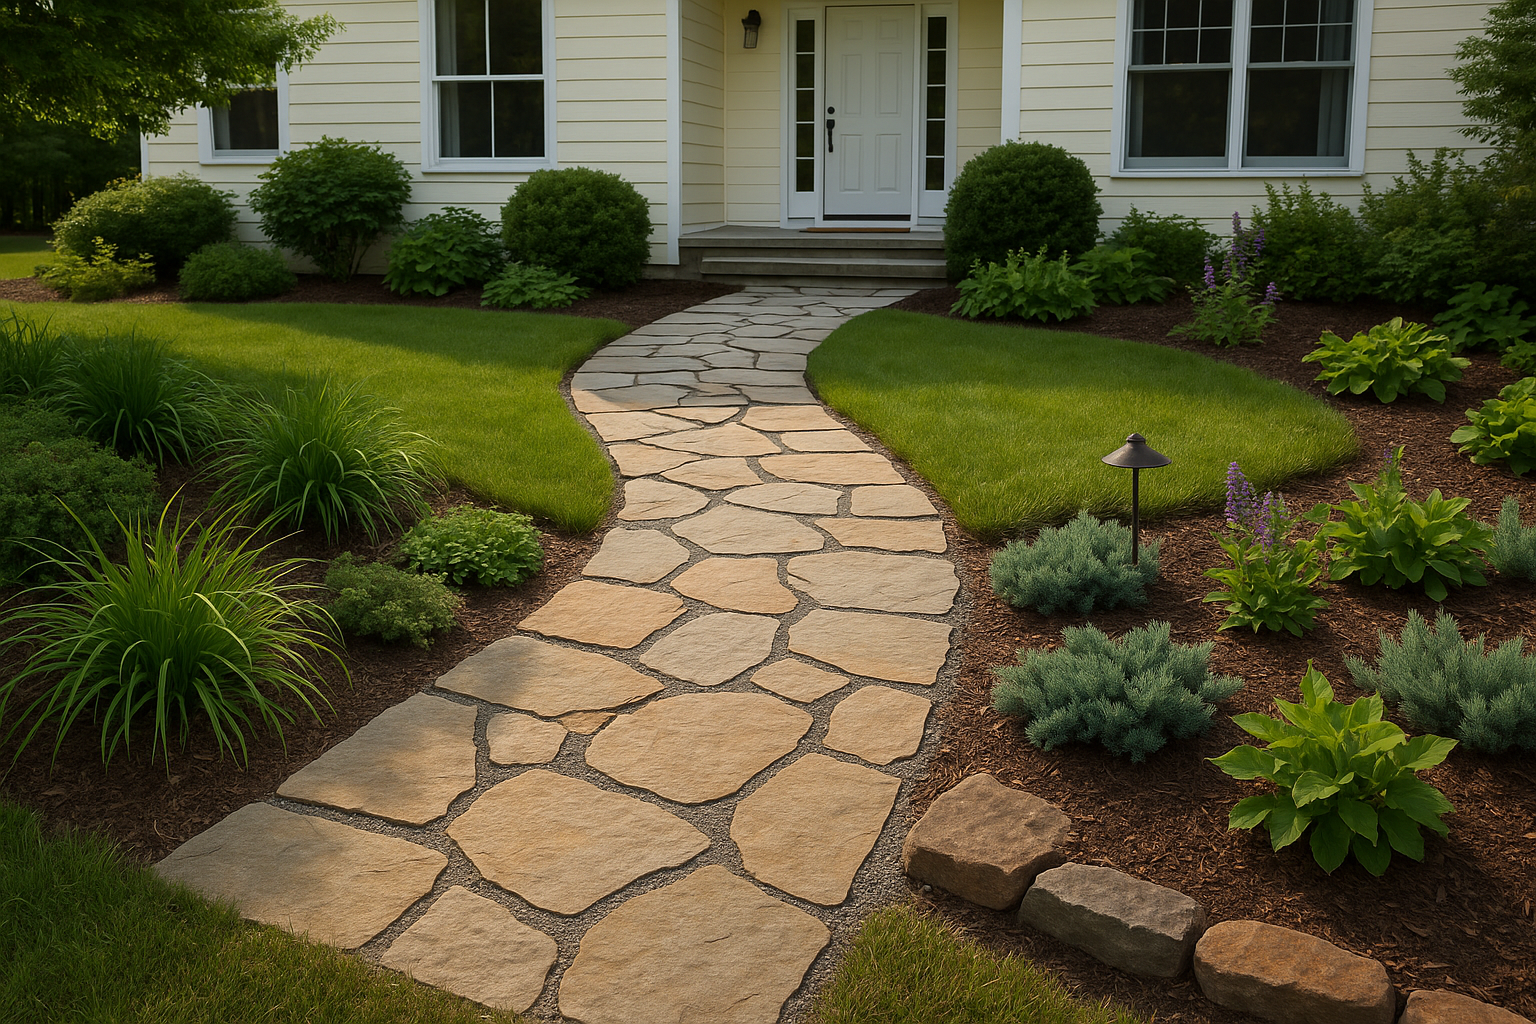
A flagstone walkway is one of those upgrades that instantly makes a yard feel more welcoming. It adds natural texture, soft color variation, and a sense of “this belongs here” that concrete pavers can’t always match. Flagstone is also versatile—you can create anything from a rustic stepping-stone path through a garden to a more formal, tightly fitted walkway leading to your front door.
Beyond looks, a properly built flagstone path holds up well in a wide range of climates. With the right base and drainage, it stays stable, resists shifting, and is easy to repair if a stone ever needs re-leveling.
Planning Your Flagstone Walkway
The best-looking (and longest-lasting) flagstone walkways start with a solid plan. Before buying stone, take time to think through the route, the style, and how the walkway should function day to day.
Pick the Best Path and Purpose
Ask yourself where people naturally walk now. Often, the “desire path” through your yard is already visible—slightly worn grass or a shortcut around landscaping beds. Designing your walkway to match that natural flow usually feels more comfortable than forcing a straight line that no one wants to use.
Also consider purpose:
- Main entry walkway: typically wider (around 36–48 inches) for comfort and curb appeal.
- Garden path: can be narrower (24–36 inches) and more organic.
- Side-yard utility path: prioritize stable footing and drainage over decorative joints.
Choose Flagstone Type, Color, and Thickness
Flagstone is a broad category that can include sandstone, slate, limestone, bluestone, and more. What you choose affects both appearance and performance.
- Bluestone: classic, durable, often more uniform; great for a clean, timeless look.
- Sandstone: warm tones and natural texture; can be more porous in some regions.
- Slate: rich color and layered texture; may flake in harsh freeze-thaw conditions if low quality.
- Limestone: light, elegant tones; can be slippery when wet if polished or very smooth.
For walkways, thickness matters. Many homeowners use 1.5–2 inches for a mortared installation and 2 inches+ for a sand or gravel-set path, especially in areas with freeze-thaw cycles.
Decide on a Walkway Style (Dry-Laid vs. Mortared)
There are two common approaches:
- Dry-laid (sand or gravel set): stones rest on a compacted base; joints are filled with polymeric sand, gravel, or plants. This style looks natural and is easier to adjust later.
- Mortared: stones are set in mortar over a slab or mortar bed; joints are grouted. This creates a more formal, locked-in surface but costs more and requires more skill.
For most landscapes, a well-built dry-laid walkway hits the sweet spot: attractive, durable, and forgiving.
How to Install a Flagstone Walkway (Step by Step)
If you’re planning a DIY project, set aside enough time for the base work. A flagstone path is only as good as what’s underneath it.
1) Mark the Layout and Set the Width
Use marking paint, a garden hose, or string lines to outline your path. Walk it a few times. Make sure turns feel natural and that the width is consistent—especially near steps, gates, or your front entry.
2) Excavate and Create Proper Drainage
Excavate deep enough for your base layers plus the thickness of the stone. A common target for a dry-laid walkway is 6–8 inches total excavation (more in clay soils or cold climates).
Plan for drainage by sloping the finished walkway slightly—about 1/8 to 1/4 inch per foot—so water runs off rather than pooling. If your yard is low or stays wet, consider adding a thin drainage layer of gravel and ensuring runoff has somewhere to go.
3) Build a Solid Base (This Is the Non-Negotiable Part)
Install landscape fabric if needed to help separate soil from your base material (especially in silty soils). Then add:
- Crushed stone base (road base): typically 3–5 inches, compacted in lifts.
- Leveling layer: about 1 inch of bedding sand or stone screenings, screeded smooth.
Compact each layer thoroughly. A hand tamper can work for small paths, but a plate compactor speeds things up and improves long-term stability.
4) Place and Fit the Flagstone Pieces
Dry-fit stones like a puzzle. Start at one end and work forward. Rotate pieces to find the best fit and keep the walking surface comfortable.
Tips for a walkway that feels good underfoot:
- Keep height differences between adjacent stones minimal (aim for under 1/4 inch where possible).
- Avoid long, narrow “teeter-totter” stones that can rock over time.
- Mix stone sizes for a natural look, or keep them more uniform for a cleaner style.
5) Fill the Joints (Sand, Gravel, or Plants)
Joint filler changes the entire character of the walkway:
- Polymeric sand: sweeps in like sand, then hardens when activated; helps reduce weeds and ants.
- Decomposed granite or gravel: soft, natural look; may need occasional top-offs.
- Groundcovers (thyme, moss, sedum): beautiful, cottage-garden feel; best in areas with appropriate sun and moisture.
Once joints are filled, gently compact or tap stones into place and recheck for wobble. Adjust as needed before calling it finished.
Design Ideas to Make Your Flagstone Walkway Stand Out
A flagstone walkway can be subtle or a true focal point. A few thoughtful design choices can elevate the whole landscape.
Add Borders for a Clean Edge
Bordering your walkway helps keep the base contained and gives the path a finished look. Popular options include steel edging, brick, cobblestone, or a soldier course of cut stone. Borders also make maintenance easier because mulch and soil stay where they belong.
Blend the Path into Planting Beds
Soften the edges with low plantings: ornamental grasses, lavender, creeping phlox, or dwarf shrubs. For a natural style, let the path gently weave through beds instead of cutting straight across the yard.
Consider Lighting for Safety and Ambience
Low-voltage path lights or subtle uplighting can make a flagstone walkway safer at night and highlight the stone texture. Even a few well-placed fixtures near steps, turns, or the entry creates a welcoming feel.
Maintenance Tips for a Long-Lasting Flagstone Walkway
Flagstone is relatively low maintenance, but a little routine care keeps it looking its best.
- Sweep regularly: especially in fall, to prevent staining from decaying leaves.
- Rinse dirt buildup: a garden hose is often enough; use a mild cleaner for stubborn spots.
- Refill joints as needed: gravel and sand can settle over time—top off annually if needed.
- Watch for shifting: if a stone settles, lift it, add bedding material, and re-level.
- Use de-icer carefully: in winter climates, choose products safe for natural stone and avoid overuse.
If you love the natural, slightly weathered look, you may not need sealing. If staining is a concern (near grills, trees that drop sap, or muddy areas), a breathable stone sealer can help—just be sure it’s appropriate for your specific type of flagstone.
Conclusion
A landscaping flagstone walkway is a practical upgrade that also adds personality and warmth to your outdoor space. With a smart layout, a well-compacted base, and the right joint filler, you’ll have a path that looks natural, feels sturdy underfoot, and ages beautifully year after year.