DIY Arbor Projects: Build a Beautiful Garden Arbor in a Weekend
Why Build a DIY Arbor?
A garden arbor is one of those simple projects that instantly makes an outdoor space feel more intentional. It can frame an entry, create a focal point at the end of a path, or support climbing plants like roses, clematis, jasmine, or grapes. The best part? Many DIY arbor projects are approachable for a confident beginner with basic tools, and you can tailor the size and style to match your yard.
Whether you want something rustic and vine-covered or clean and modern, building your own arbor lets you control the budget, materials, and finish—without settling for a one-size-fits-all kit.
Popular Types of DIY Arbor Projects
Before you buy lumber, decide what job your arbor needs to do. Different designs look similar at a glance, but they vary a lot in strength, installation, and maintenance.
Classic garden arbor (entryway style)
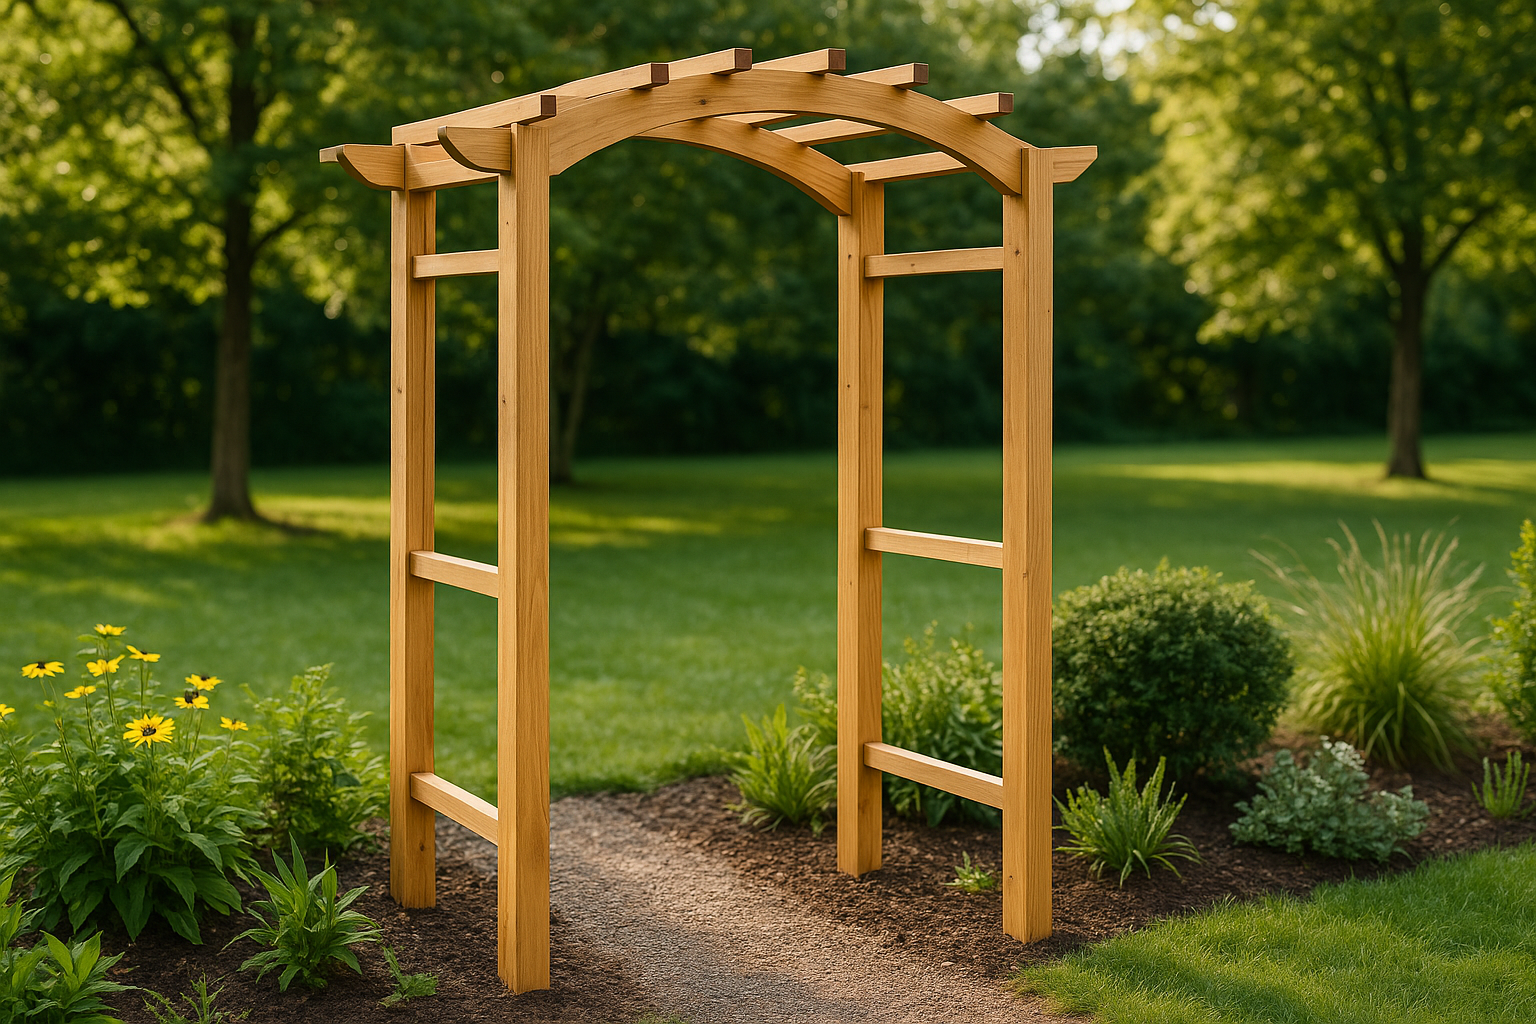
This is the most recognizable design: two sides with simple lattice or slats, topped with a curved or flat header. It’s ideal over a walkway, between garden “rooms,” or at the start of a path. If you plan to grow vines, make sure the side panels include enough cross pieces for tendrils to grab.
Arbor with a gate
Add a gate if you want that charming “secret garden” feel or need a practical barrier for pets. When planning this version, focus on sturdy posts and hardware—sagging gates are common when posts aren’t set deep enough or when the gate is too wide without support.
Arbor bench (arbor + seating)
An arbor bench combines an overhead frame with built-in seating, creating a cozy spot for morning coffee. It’s a great DIY arbor project for small yards because it adds structure without taking up much extra room. Use exterior-rated fasteners and rot-resistant wood, since the bench will take more wear than a standard arbor.
Pergola-style arbor (heavier, more architectural)
If you want something substantial—almost like a small pergola—build a thicker frame with larger posts and multiple top rafters. This style works well as a transition from patio to lawn or to define an outdoor dining area. It’s also a smart choice in windy climates where a light arbor might rack over time.
Materials and Tools You’ll Need
The exact shopping list depends on your design, but most DIY arbor projects use the same core materials. Planning ahead saves trips to the hardware store and helps you build straighter, stronger, and faster.
Best wood choices for outdoor arbors
- Cedar: Naturally rot-resistant, lightweight, and easy to work with. Great for staining or leaving unfinished to weather to a silvery gray.
- Redwood: Beautiful and durable, but often pricier depending on your region.
- Pressure-treated lumber: Budget-friendly and strong, especially for posts. Let it dry before painting or staining for best results.
- Composite or PVC: Low maintenance and clean-looking, though not everyone loves the “too perfect” appearance.
Common hardware and fasteners
- Exterior-grade screws (deck screws are a safe bet)
- Galvanized or stainless bolts for key joints
- Post bases or anchors (if attaching to concrete)
- Concrete mix (if setting posts in the ground)
- Gate hinges and latch (if building an arbor with gate)
Tool checklist
- Measuring tape, speed square, level
- Circular saw or miter saw
- Drill/driver and bits
- Clamps (helpful for lining up joints)
- Post hole digger (or auger) if setting posts
- Safety gear: gloves, eye/ear protection
Step-by-Step: How to Build a Simple DIY Garden Arbor
This high-level process works for many entryway-style arbors. Adjust dimensions and trim details to fit your space and style.
1) Plan your size and placement
Start with the location: a path, garden gate, or opening between beds. For a comfortable walkthrough, aim for an opening around 36–48 inches wide and a height of at least 80 inches. If you’ll train climbing plants, leave space on the sides so growth doesn’t narrow the opening too quickly.
2) Prep the posts and footings
For the most stable arbor, set posts in the ground below the frost line (often 24–36 inches, depending on climate). Use gravel at the bottom of the hole for drainage, then set posts plumb and pour concrete. If you’re mounting to an existing slab, use post bases rated for exterior structural use and follow the anchor manufacturer’s instructions.
3) Build the side panels
Side panels can be simple frames with horizontal slats, diagonal bracing, or lattice inserts. Pre-assemble them on a flat surface if possible, checking for square. If you want an arbor that handles heavy vines, use more frequent slats rather than thin, flexible lattice.
4) Install the header and top slats
The header ties everything together visually and structurally. Some DIY arbor projects use a flat header; others add a gentle curve for a classic look. Once the header is secured, add top slats or rafters for shade and style. Keep spacing consistent—using a scrap spacer block makes this quick and clean.
5) Add trim details (optional but worth it)
Trim boards, decorative end cuts, and simple corner blocks can make a basic arbor look custom. If you’re new to decorative cuts, make a cardboard template first and test the shape on a scrap board before cutting your final pieces.
6) Sand, seal, and finish
Light sanding removes splinters and helps stain go on evenly. Choose an exterior stain or paint rated for UV and moisture exposure. If you love the natural wood look, a clear exterior sealer can slow graying and reduce water absorption, though you’ll need to reapply periodically.
DIY Arbor Project Ideas to Make It Your Own
Once you’ve built the basic structure, small upgrades can take your arbor from “nice” to “can’t stop staring at it.”
Train climbing plants for a living canopy
Climbers can soften hard lines and add fragrance. Pick plants suited to your sun exposure and local climate, and give them a head start with garden ties or soft twine. Keep in mind that some vines get heavy—design accordingly.
Add lighting for evening impact
Solar string lights, low-voltage path lighting, or a single outdoor-rated sconce can make an arbor feel magical at dusk. Conceal wiring neatly and use weather-rated fixtures to keep it safe and long-lasting.
Include a gate, trellis panels, or planter boxes
A simple gate adds charm and function. Trellis side panels increase support for vines and give the arbor a more finished look. If you’re tight on garden space, consider planter boxes at the base—just make sure they don’t trap moisture against the posts.
Tips for Long-Lasting Results (and Fewer Headaches)
- Prioritize sturdy posts: Most wobble comes from shallow footings or undersized posts. When in doubt, go bigger.
- Use exterior-rated fasteners: Interior screws can rust and stain the wood (and fail sooner than you’d expect).
- Think about wind and vines: A vine-covered arbor catches more wind. Add diagonal bracing if your area is breezy.
- Seal end grain: The ends of boards absorb moisture fastest. A little extra sealing here can extend the life of your build.
- Check it once a season: Tighten hardware, look for soft spots, and touch up finish before small issues grow.
Conclusion
DIY arbor projects are a satisfying way to add structure, height, and personality to your garden without a massive renovation. With a solid plan, weather-ready materials, and a weekend of focused work, you can build an arbor that looks custom and lasts for years—especially when you finish it with thoughtful details like lighting, a gate, or climbing plants.